Monday, November 7, 2011

Fall Fruit Crumble


Ok, ok, I know this looks like my recent entry about apple crisp, but I promise I won't post another blog about crisps or crumbles again!! Well, unless you want them;) I'm on a fall flavors kick, since I love fall, and I also liked the idea of doing something else with cranberries other than making them for the big Turkey Day!! I hope you enjoy this recipe as much as my family did, they ate almost all of it in one night!!


Fall Fruit Crumble (Adapted from "Come One, Come All Easy Entertaining With Seasonal Menus" by Lee Svitak Dean)

2 ripe pears peeled, cored and cut into 1/4-inch slices
2 large apples peeled, cored and cut into 1/4-inch slices
2 teaspoons lemon juice

1 cup fresh cranberries
2 tablespoons granulated sugar
1/2 teaspoon cinnamon
1/2 cup flour
1/4 cup firmly packed brown sugar
1/2 cup rolled oats
Half a stick of butter at room temperature, cut into small pieces

9x9 inch baking dish

Preheat oven to 350 degrees F. In a large bowl gently toss the pear and apple slices in the lemon juice till coated. Next add the cranberries, granulated sugar, and cinnamon and toss again till all the fruits are covered. Spread the fruit in an ungreased 9x9 in baking dish and set aside.


In a medium bowl use a pastry cutter or fork to blend the butter pieces into the flour and brown sugar till lumpy and a course mixture is formed.


Finally, add the rolled oats and use your hand to blend until evenly incorporated into the butter mixture. If you squeeze an amount together in your hand it should all sick together.


Crumble the oat butter mixture evenly over the prepared fruit and place in the oven for about 30-35 minutes until the top is lightly browned and the liquids from the fruit are bubbly. Remove from oven and let rest. Devour with ice cream or whipped cream!!

Hope you all enjoy this fall treat!! Happy baking!!:)


"Mise en place"


Hello all you beautiful people out there in blogger world!! Before I dive right into all the juicy details about my first day at culinary school, I wanted to take a moment to say thank you for reading this hodge podge of a blog I call my own. I don't say it too often, but appreciate all the support I receive from all of you who take the time out of your days to read what I have to say whether it be about food, life, or any other wacky idea that may come to mind. I really appreciate it!! Without all of you I don't think I would've taken the plunge to start culinary school at all, so thank you. 

Enough of the mushy stuff, and on to the deets from today's class. "Mise en place", the main French term we talked about today. In the culinary world it means "everything in it's place", but as we talked about it in my first foundations lecture today, it came to mean a lot more to me. Personally I have always struggled to find "my way" in the world, my niche or drive. Cooking always seemed like an unreachable option that was always just something I enjoyed doing when I got bored, or what I would "just do" when I didn't have anything else to do. However, over time it meant a lot more for me and my enjoyment for food and preparing food grew into a real passion. And while sitting in class Chef Luke asked us if any of us didn't WANT to be there to raise their hand, and no one did. We all have a genuine love and drive for food, we all want to expand on our skills we have acquired in our kitchens, at our jobs, or elsewhere. That's when I knew I found my own little "mise en place".


I'm going to be blogging a lot more about school and what I learned so keep an eye out for those posts!! These are a few of the tools and books we got in class today!! Can't wait till I get some time to puruse through these babies!!:)

Saturday, November 5, 2011

Seattle...AGAIN & crossing bridges in Canada


The weekend of my birthday I was lucky enough to get to go and visit my friends up in Seattle and make a trip up to Canada that I have been planning for months now!! I have been wanting to go to the Capilano Suspension Bridge for FOREVER(trust me I had talked to my old workers about it for months)!!! I had seen it on one of those lists like "The 100 Most Amazing Sights to See Before You Die", and seeing as its a hop, skip and a jump away from my home, I thought "Why not go?!", and no reason popped into my head!! SO off I was another adventure through the great Northwest. Here are some pics from my trip!!

My girlfriend, Jerrica, made this awesome cake for me. I was so happy receive a cake, and knowing she made it made it even better!!


One of the places I had heard about for a while now was Paseo. It's a Caribbean restaurant that had the most amazing sandwiches..this is my sandwich, the Caribbean roast...mmmm, pork. Ok, drooling a little as I remember how amazingly awesome and succulent the meat and veggies were. Ahh, sandwich. Ok, sorry, getting back to my trip.


Also, while in town I got to visit a vegan restaurant my friend works at called Plum Bistro. I am not a vegan (I love meat with a passion) but, when my friend first told me that he worked here, I was very eager to try it. I was eight blocks eager, because that's how far I had to walk in the chilly Seattle air to get to Capitol Hill, where it is located.:-/ Not complaining, just stating facts;-) Anywho! The ambiance was very mellow and earthy, there were mossy planters hanging along the cement walls, the bar was a dark mahogany color, and even though a little small, it was very cozy. And then came the food...


To my left we have Spicy Cajun Mac 'n' Yease, this was absolutely the bomb dot com!! I couldn't even tell it was vegan, the spice, the gooey texture and the noodles, and the crunchy bread crumb topping...ok drool moment again!! And to my right we have an avocado roll, I can't really say too many good things about this one, it was pretty average to me, pales in comparison to the Mac 'n' Yease.


Next on the menu we had gluten free, Raw Tacos. These babies consisted of avocado, tomatoes, soy ricotta, spinach, cilantro, and fresh salsa. Again, I wasn't too preferential to these, partially because I was wondering if I would need to eat again later (I'm one of those people that can't just eat a salad or I know I will get hungry in an hour or so), that was until I got my burger...


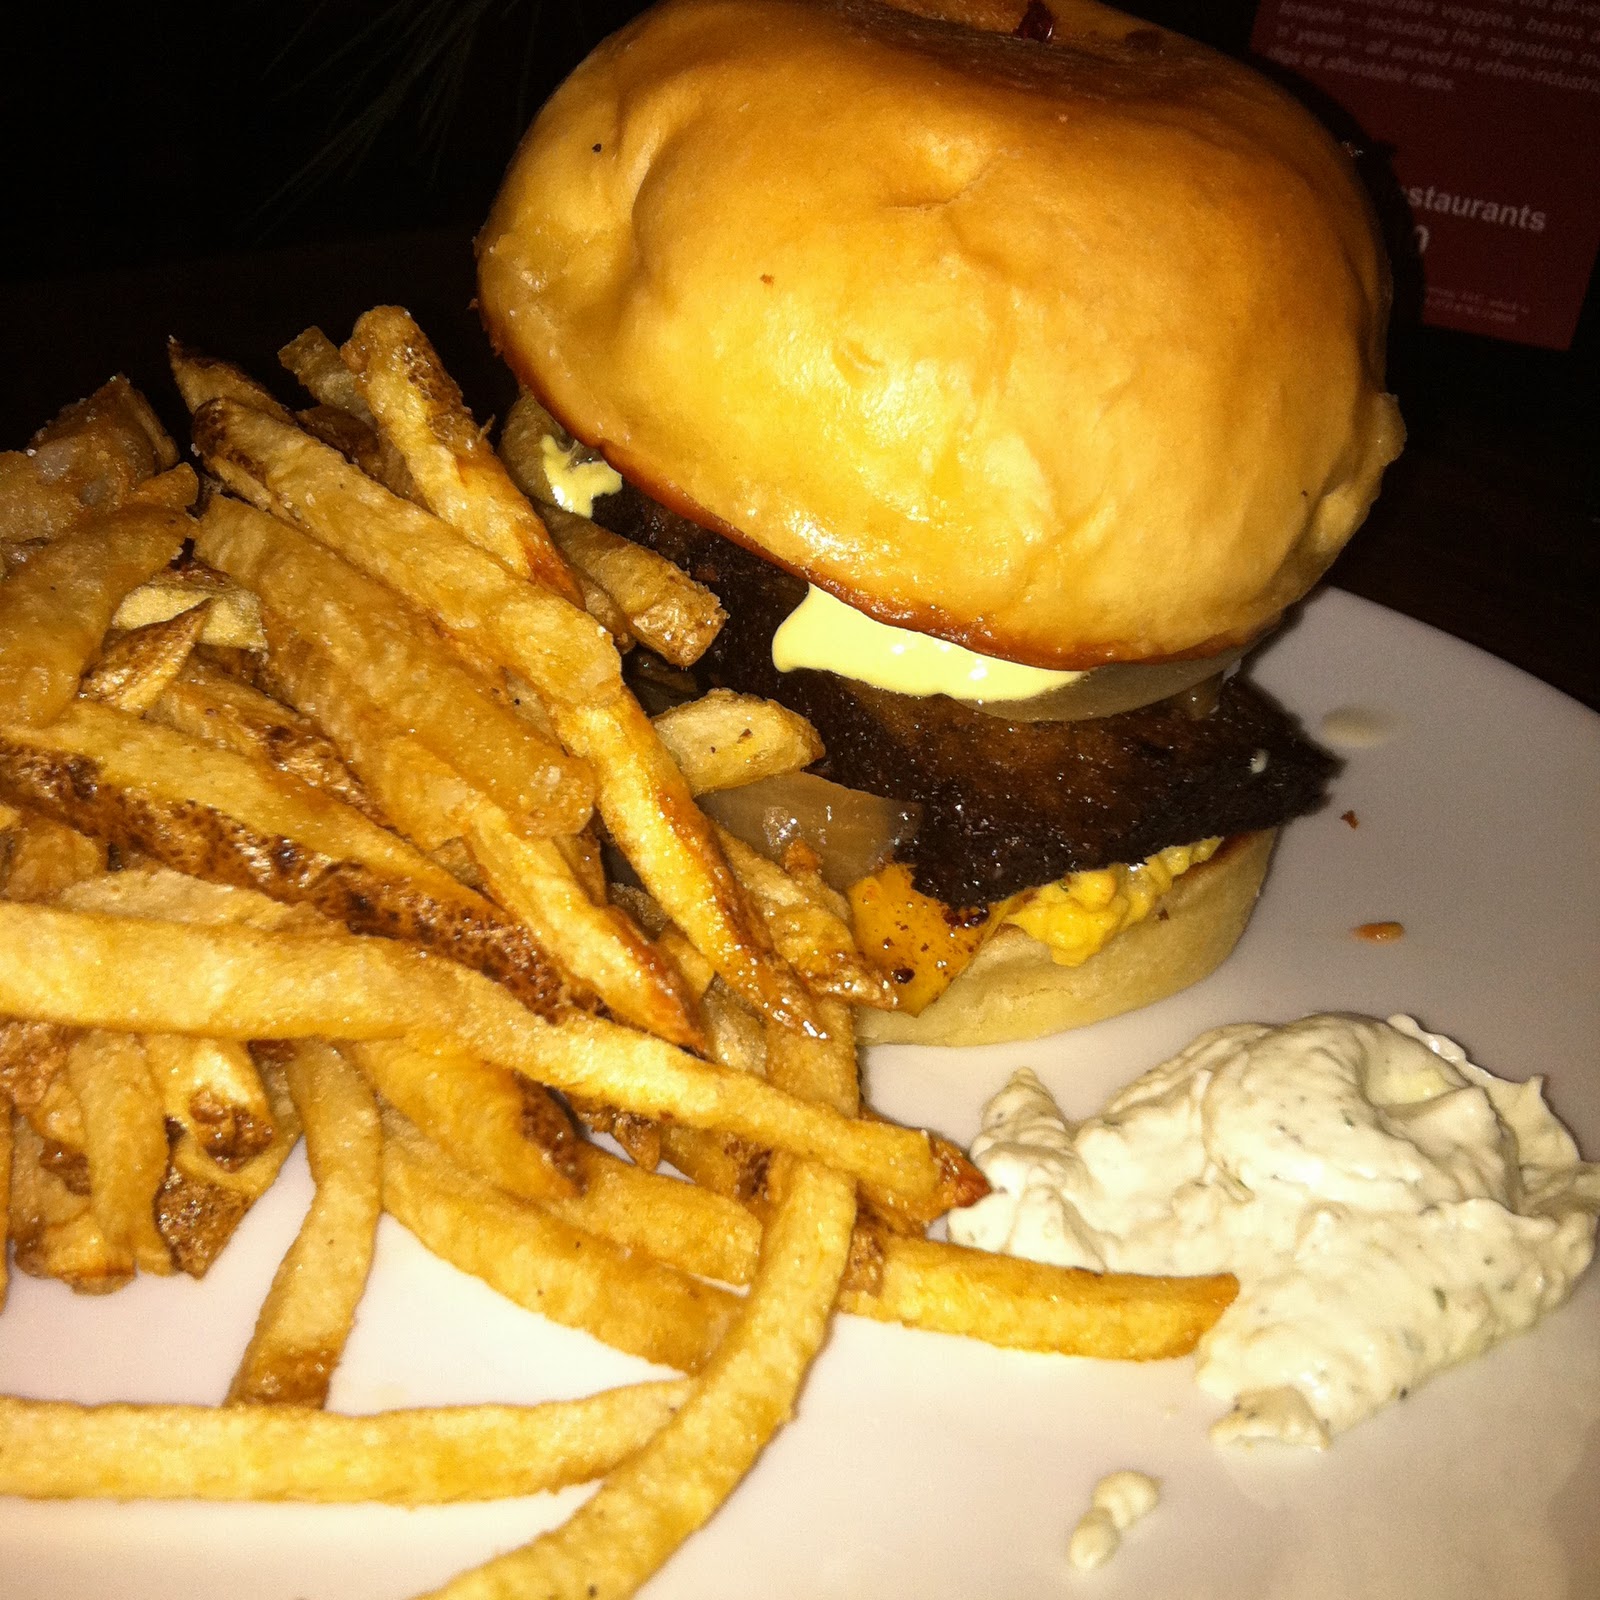
The Crazy Jamaican Burger, YUMM-O!! This jerk tofu burger was paired with ripe plantains, frilled sweet onions, potato salad, and house vegan mayo!! And the shoe string fries definitely didn't hurt!! I was completely full and happy when I left! I don't know if I will visit this restaurant again, only because I love meat, but if you are a carnivore and want to test the herbivore waters, why not try Plum;-)


Finally, I made it to my bridge!! A successful and happy trip up to Canada!! Can't wait for my next adventure!!:-)


Saturday, October 22, 2011

Fall Apple Crisp & Other News ^_^


As far back as I can remember my mom has always made this delicious apple dessert--for holidays, birthdays, and just because--and I have always remembered this slightly spiced, apple crumbly goodness. Since tonight was my "Make-up Birthday Dinner" and my dad was nice enough to cook me up some Chamorro dishes for our main course, I decided I would make this simple dessert, carrying on the tradition my mother had started from before I was born.


I haven't actually made this dessert in quite a while! So pulling out this old recipe book made me investigate a little more into where this recipe had actually come from. This was actually a recipe book my mother had bought from one of her co-workers, whose child had gone to Waiokeola Pre-School from 1983. The recipe itself was a contribution by Jann Rogers, so thank you Ms. Rogers for this delicious taste of my childhood.


Apple Crisp (Adapted from Gingerbread & Cranberries)

4 cups apples (peeled and sliced) *I used 2 Granny Smith and 2 Gala
1 tsp. cinnamon
1/4 cup water
1/2 tsp. salt
1 cup sugar
1/3 cup butter (softened) 
3/4 cup flour (sifted) 
1/3 cup oatmeal 

8x8 in pan 


Pre-heat oven to 350 degrees. Spread apples in pan, I like to layer them evenly after I have sliced them. It gives them a more even bake and everyone gets an equal amount in each serving. 


Mix the water, cinnamon, and salt. Evenly drizzle mixture over the prepared apples and set aside.


In a small bowl use a pastry cutter to combine the sugar, flour, and butter until crumbly. Add in the oatmeal and mix in with a spoon. The topping should pack together if squeezed in your hand. I like to squeeze handfuls of the mixture in my hand and break up as I top the apples. The bigger crumbles taste so good when they cook up and get a little crunchy^_^ Bake uncovered for 40 minutes, making sure the liquid at the bottom boils and the top is evenly golden brown when you remove it from the oven. 


MMMMMMMMMMM, so good!! This delicious dessert was the perfect ending to my "Make-up Birthday Dinner" and I can't wait to re-heat it and eat it tomorrow...luckily its just as mouth watering the next day^_~ 
Happy baking!!^_^
P.S.-I received my orientation notification for culinary school!! I'm starting this November!! AAAH can't wait!!^_^


Wednesday, October 12, 2011

Just Because...

As I had mentioned in one of my previous blogs, its fall here in the great Northwest. SOO I've been craving some great comfort food recipes to try out! And if you have been keeping up with my blog at all, you'll know I absolutely love cinnamon!! I think it's because my favorite season is fall and I have always loved the fall--the chilly weather, the warm sweaters you get to wear, the leaves changing colors, and the first cup of cocoa on a chilly morning--all these things bring a little bit of warmth before the LOOOONG rainy winter.

In light of my craving and my love for cinnamon I decided to scour the internet for some tasty treats that just scream fall!! As I was checking out one of my fave websites, Tastespotting.com (which, I wouldn't recommend checking out on an empty stomach, I can't tell you the number of times I've gone on and headed straight to the kitchen right after for a snack!!) I stumbled upon this delightful cinnamon pull-apart bread recipe. If that doesn't say FALL I don't know what does!! As, I was reading the recipe a few wheels started to turn in my brain, I loved the idea of this bread with it's browned butter (which, to me, smells like warm caramel), and its added hint of nutmeg, but I wanted to put a lil' extra so why not make a cream cheese frosting on top?! I couldn't wait to try it out! I decided to make it for my friend Jen, and her boyfriend Lyle, since Jen was recently sick and I wanted to give her something to help cheer her up.


Cinnamon Pull-Apart Bread (Adapted from Broma Bakery)

For the Dough:
2 3/4 cups plus 2 tablespoons all-purpose flour * I used bread flour instead, because the ascorbic acid helps the fermentation process when the dough is rising*
1/4 cup granulated sugar
2 1/4 teaspoons (1 envelope) active dry yeast
1/2 teaspoon salt
2 ounces unsalted butter
1/3 cup whole milk
1/4 cup water
2 large eggs, at room temperature
1 teaspoon pure vanilla extract

For the cinnamon sugar filling:
1 cup granulated sugar *I used brown sugar packed because I like the taste and richness of brown, but plain white sugar will work*
2 teaspoons ground cinnamon
1/2 teaspoon fresh ground nutmeg
2 ounces unsalted butter, melted until browned

For the Cream Cheese Frosting: * These measurements are all guesstimates, I mixed everything to taste since I like my frosting to be a little runny but still have great body and taste*
¾ of a block of cream cheese softened
2 tablespoons butter softened
¾ cup powder sugar (add more to taste)
1 teaspoon vanilla extract
½ cup milk
Small pinch of salt


In a large mixing bowl whisk together 2 cups flour, sugar, yeast, and salt. Set aside.

Whisk together eggs and set aside.

In a small saucepan, melt together milk and butter until butter has just melted. Remove from the heat and add water and vanilla extract. Let mixture stand for a minute or two, or until the mixture registers 110 to 115
°F.

Pour the milk mixture into the dry ingredients and mix with a spatula. Add the eggs and stir the mixture until the eggs are incorporated into the batter. The eggs will feel soupy and it’ll seem like the dough and the eggs are never going to come together. Keep stirring. Add the remaining 3/4 cup of flour and stir with the spatula for about 2 minutes. The mixture will be sticky. That’s just right.

Place the dough is a large, greased bowl. Cover with plastic wrap and a clean kitchen towel. Place in a warm space and allow to rest until doubled in size, about 1 hour. The dough can be risen until doubled in size, then refrigerated overnight for use in the morning. If you’re using this method, just let the dough rest on the counter for 30 minutes before following the roll-out directions below.

While the dough rises, whisk together the sugar, cinnamon and nutmeg for the filling. Set aside. Melt 2 ounces of butter until browned. Set aside. Grease and flour a 9x5x3-inch loaf pan. Set that aside too.

At this point, place a rack in the center of the oven and preheat to 350°F.

Deflate the risen dough and knead about 2 tablespoons of flour into the dough. Cover with a clean kitchen towel and let rest for 5 minutes. On a lightly floured work surface, use a rolling pin to roll the dough out. The dough should be 12-inches tall and about 20-inches long. If you can’t get the dough to 20-inches long… that’s okay. Just roll it as large as the dough will go. Use a pastry brush to spread melted butter across all of the dough. Sprinkle with all of the sugar and cinnamon mixture. It might seem like a lot of sugar.


Slice the dough vertically, into six equal-sized strips. Stack the strips on top of one another and slice the stack into six equal slices once again. You’ll have six stacks of six squares. Layer the dough squares in the loaf pan like a flip-book. Place a kitchen towel over the loaf pan and allow in a warm place for 30 to 45 minutes or until almost doubled in size


Place loaf in the oven and bake for 30 to 35 minutes, until the top is very golden brown. The top may be lightly browned, but the center may still be raw. A nice, dark, golden brown will ensure that the center is cooked as well.


*I had extra cinnamon sugar so I put some on top before letting it rise*


Remove from the oven and allow to rest for 20 to 30 minutes. Run a butter knife around the edges of the pan to loosen the bread and invert onto a clean board. Place a cake stand or cake plate on top of the upside down loaf, and carefully invert so it’s right side up.


In a medium bowl with an electric mixer mix the softened cream cheese, butter, and sugar till blended, it will be a little thick, but the liquids will thin it out a lot. Next, add the vanilla, milk, and salt mix until silky and smooth. Once the bread has cooled spread over and ENJOY!!^_^


Mine came out a little crazy looking, but I loved the way the pieces looked broken and turned every which way^_^ Jen and Lyle loved it and I have to say, the cream cheese frosting helped balance out the crustier parts of the bread and added a lot of extra flavor to the cinnamon. Jen, also gave me my early birthday gift!! YAY cupcake book, silicone cupcake cups, bright colored markers, bright 80's shades and a kitty card!! Can't wait for my birthday tomorrow!!^_^ Happy baking people!!


Saturday, October 8, 2011

Corie & Andrew got HITCHED...and some desserts^_~


CONGRATS again to my beautiful sister, Corie and her NEW husband Andrew on their marriage this past September!! As I had mentioned in my previous blog, The Great Cake Challenge, I was commissioned by my sister to make SEVEN cakes at the time! Luckily for me, and my sanity, she cut it back to two kinds of cake, NY style cheese cake and vegan chocolate. She also tacked on two type of cookies, per the grooms request, a lime glazed short bread, and per my sister's request, a Double Sexual Chocolate cookie (I think she just liked the name^_~). Here is how they all turned out...


I paired the NY style cheesecakes with my mom's and Andrew's mom's homemade jams. They were a perfect pair, the slightly tangy cheesecakes were topped with a sweetened vanilla sour cream and crystallized almonds along with the fruity jams of blueberry, blackberry, or strawberry!! YUMM-O!!!


The almond flavored chocolate frosting is always a great pairing with the rich chocolate vegan cake and was a BIG hit at the reception!!^_^ And the cookies, well there weren't any left at the end of the night so they must've loved them just as much as I do!! All in all a great night with food, family, fun and best of all DESSERTS!!^_^ Happy eating!!

OSCAR THE GROUCH adds another year^_~ AND Auntie Rina's Chocolate Eclair Dessert


Hello again!!^_^ Ok, took some time off from the blog...AGAIN!! But, trust me, I now have a heck of a lot more time to send some "sweet" love around the world. AND to make up for it ,I came back with not only a celebration, but also an easy peasy recipe for all of you out there in blogger world to try!! 

By the way, the picture above isn't to scare y'all out there, even though Halloween is right around the corner; it's my dad, Oscar. My family and I just celebrated his "umpteenth" birthday yesterday, I bought him a pretty blue candle to go with the birthday treat I made him, Auntie Rina's Chocolate Eclair Dessert!! I don't know about you, but when the weather starts to get cold (anything below 70, I grew up in HAWAII people, cut me some slack),  and the leaves start turn that beautiful blazing red around the edges I CRAVE comfort food, and this recipe was the perfect luscious and creamy dessert to feed my craving. I learned about this amazing dessert at my sister's wedding this past month. My Auntie Rina (also known for her mouth wateringly bombastic red velvet recipe) introduced me to it and made some for my sister's reception. She switched it up a bit from the original recipe and instead of using plain old chocolate frosting she opted for chocolate pudding because she said it had a "lighter" taste. AND let me just tell you, this recipe is the EASIEST dessert I have made in a while, NO BAKING NECESSARY!!!^_^ Yeah, I knew that would make your heads turn!!^_~  Ok, so let's get to it!!


Auntie Rina's Chocolate Eclair Dessert (Adapted from AllRecipes.com)

1 box graham crackers
2 (3 ounce) packages instant vanilla pudding mix
3 cups of cold milk
1 (8 ounce) container cool whip, thawed
1 (5 ounce) package instant chocolate pudding mix
2 1/2 cups cold milk


Line the bottom of a 9x13 pan with graham crackers.


In a large bowl, with a whisk, mix the 3 cups of cold milk with the 2 packages vanilla instant pudding mix until the pudding mix dissolves.


Next, add the container of cool whip to the vanilla pudding mixture and mix till creamy. *This was the part I jumped the gun on, I forgot to let the cool whip thaw and I had to stir a little longer till all the frozen lumps came out...oopsies!!*


Spread half of the cool whip vanilla mixture over the first layer of graham crackers. Spread with a spatula or spoon to even out.


Follow with another layer of graham crackers and the other half of the vanilla mixture. Put one final layer of graham crackers and set aside. In another bowl use a whisk to mix the 2 1/2 cups cold milk with the package of chocolate instant pudding mix. *BE CAREFUL the pudding sets pretty quickly and if you don't want to have to "fuss with it" as my Auntie Rina says and make it "pretty on top" whisk until JUST dissolved* Then carefully pour the chocolate over the last layer of graham crackers, cover with plastic wrap and refrigerate.


IMPATIENT PEOPLE BEWARE!! I HIGHLY suggest letting this baby sit in your fridge OVER NIGHT!! I know, I know, it will be hard not to want to dig into this amazing luscious and creamy dessert before the next day, but TRUST!! It will be worth it!! The graham crackers absorb some of the moisture from the puddings and they get soft enough to cut a knife through them, and with the combo of the vanilla and chocolate, MMMMMMMM! I did a "happy penguin" wiggle when I ate this and I'm sure you will too!! And YES, I am eating some as I write this blog...*Penguin Wiggle*^_^ Happy eating!!